Many people with 2-way radios, scanners, or whatever device which uses RS-232 serial data communication, and like many others I have a modern laptop with no serial port. Serial ports on laptops were common years ago, and some new ruggedized (and expensive) laptops have serial ports, but all laptops have USB.
USB-to-serial adapters are plentiful though many have serious problems with cheap components making them not usable with most software (i.e. Prolific). To date the brands I found reliable are Belkin and IOGear. Many people praise Tripp Lite Keyspan High-Speed USB to Serial Adapter (USA-19HS), http://www.tripplite.com/en/products/model.cfm?txtSeriesID=849&txtModelID=3914. Don’t bother saving a few bucks by spending time to find one for $20 instead of $30, just get a good adapter and be done with problems
Following are step-by-step instructions to put your USB-to-serial adapter to a known Com port number. Let’s say you installed Icom programming software (RSS), connected the RIB cable (almost all have 9-contact RS232 D-connector) from radio to your USB-to-serial adapter. You set the Com port in the RSS program but now need to match the com port of the USB-to-serial adapter. Following is for MS Windows XP, these steps can be used for newer and older versions of Windows, specifics may be a little different.
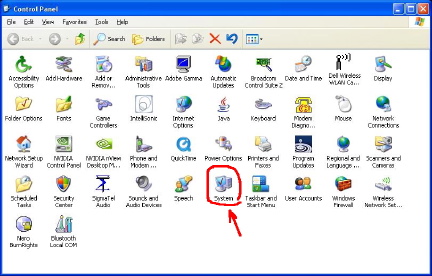
1. Open Control Panel, go to “Start” and select “Control Panel”
2. Double click “System” in the Control Panel.
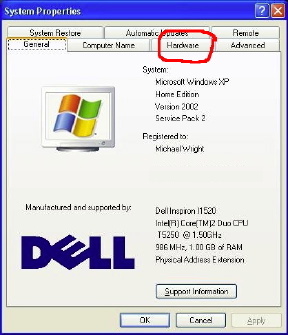
3. In System Properties, click “Hardware” tab.
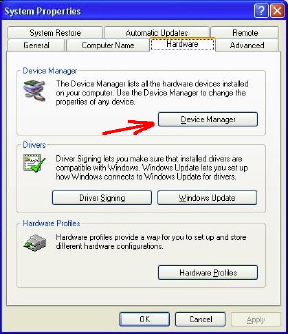
4. Then click “Device Manager” button.
5. “Device Manager” shows PC hardware, click the “+” for “Ports (COM & LPT) ”
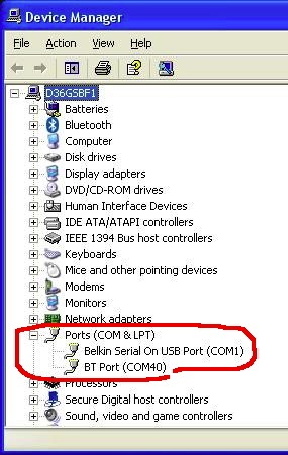
This has a Belkin USB-to-Serial cable on COM1, COM40 for a Bluetooth adapter (your system may vary).
6. Right click “(COM1) Properties” (your COM may have different title), this window will appear,
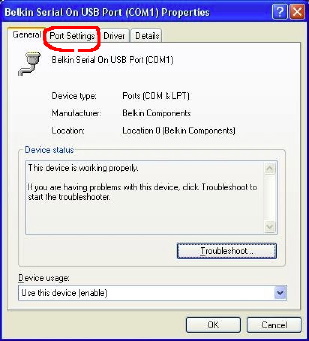
7. Click the “Port Settings” tab, this will show bps, data bits, parity, etc for that COM port.
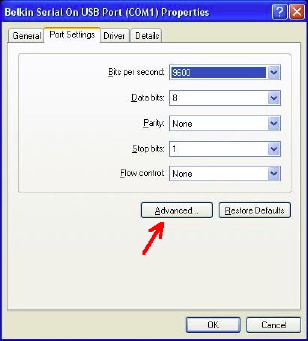
8. Click “Advanced...” button, below will have COM Port Number.
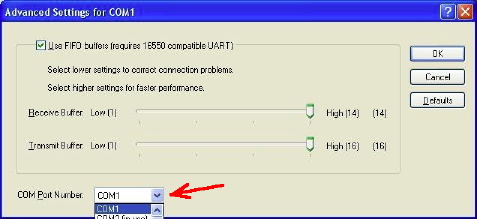
9. Pull down or scroll to which “COM Port Number” to set appropriate COM # (some may be in use).
10. When done, click the “OK” or “Apply” button on each window which will close it.
Other stuff:
Also note if USB-to-Serial cable were to be connected to another USB port, the COM numbers will be different or not declared at all. You will have to start all over again to establish a working com port.
There are shortcuts from the PC desktop that enables you to go direct to some of these windows, use those as you find appropriate (above is basically universal).
Steps in brief: